Recipe for old fashioned chocolate icing provides a detailed guide to crafting a classic, decadent treat. This comprehensive recipe covers everything from ingredient selection and mixing methods to achieving the perfect texture and applying the icing to various baked goods. Discover the secrets to creating a beautiful and delicious chocolate icing, whether you’re a seasoned baker or a beginner.
This recipe dives into the nuances of old-fashioned chocolate icing, exploring ingredient variations, mixing techniques, and desired textures. It will empower readers to confidently create professional-looking results at home.
Ingredients & Proportions
Old-fashioned chocolate icing, a classic for a reason, is surprisingly easy to make. It’s a versatile topping for cakes, cookies, and more, and the simple ingredients blend together beautifully. The key is getting the right balance of sweetness, richness, and smoothness.This section dives into the specific ingredients and their roles in achieving that perfect chocolate icing. We’ll cover typical ingredient lists, their ideal proportions, and even explore some delicious variations.
Typical Ingredients and Proportions
This table Artikels the fundamental ingredients and their typical quantities for a batch of old-fashioned chocolate icing.
| Ingredient | Quantity | Unit |
|---|---|---|
| Powdered Sugar | 2 cups | |
| Unsalted Butter | 1/2 cup | (softened) |
| Unsweetened Cocoa Powder | 1/4 cup | |
| Milk | 2-4 tablespoons | (or more, as needed) |
| Vanilla Extract | 1 teaspoon |
Importance of Each Ingredient
Each ingredient plays a crucial role in the icing’s final texture and taste. Powdered sugar provides the sweetness and helps create a smooth consistency. Butter adds richness and helps the icing hold its shape. Cocoa powder delivers the deep chocolate flavor. Milk acts as a binder, allowing the icing to spread smoothly and preventing it from being too stiff.
Vanilla extract enhances the overall flavor profile.
Variations in Ingredient Choices
The basic recipe can be adapted to suit different preferences. For instance, you could use a different type of chocolate, such as dark chocolate or semi-sweet chocolate chips, for a more intense flavor. Substituting some or all of the powdered sugar with a different sweetener, like honey or maple syrup, can create a unique flavor profile. You can also experiment with different types of milk, such as whole milk, 2% milk, or even non-dairy milk alternatives.
These changes can subtly alter the icing’s texture, sweetness, and overall taste.
Mixing Methods & Procedures
Getting your chocolate icing just right is all about the mixing. The right tools and techniques make all the difference between a smooth, glossy finish and a lumpy mess. This section will walk you through the steps, ensuring your icing is perfect for your treats.
Ingredient Combination
Combining the ingredients is the first step. This is where you’ll get the initial texture and consistency. Use the right tools for the job, and the process will go smoothly.
- Gather all your ingredients. Having everything ready beforehand saves time and prevents any last-minute scrambling.
- In a large mixing bowl, combine the powdered sugar, cocoa powder, and salt. This is best done with a whisk to ensure even distribution.
- Gradually add the milk or cream, mixing until a smooth, lump-free paste forms. A wooden spoon is perfect for this.
Mixing Techniques
Mixing techniques, like creaming and whisking, are crucial for achieving a smooth and consistent icing. Different techniques are needed at different stages.
- Creaming is used to incorporate air into the mixture, which lightens and smooths it. A stand mixer with a paddle attachment is ideal for this stage.
- Whisking helps to create a smooth, glossy finish and ensures all the ingredients are thoroughly combined. A hand whisk or stand mixer with a whisk attachment is ideal.
Step-by-Step Procedure
This detailed procedure ensures a perfect outcome every time.
- In a large bowl, whisk together the powdered sugar, cocoa powder, and salt until evenly distributed.
- Gradually add the milk or cream, mixing with a wooden spoon until a smooth, lump-free paste forms. Make sure the mixture isn’t too thick or too runny.
- If using a stand mixer, switch to a paddle attachment and mix on low speed until smooth. Then, increase the speed to medium for a few minutes to incorporate air, creating a light and fluffy texture.
- For a smoother finish, use a hand whisk or the stand mixer’s whisk attachment to whisk the icing until it’s glossy. This step is important for achieving that professional look.
- If the icing is too thick, add a little more milk or cream, a teaspoon at a time, until it reaches your desired consistency. If it’s too thin, add a little more powdered sugar. Taste and adjust as needed.
Mixing Steps Table
This table summarizes the mixing steps, tools, and estimated time for each stage.
| Step | Tools | Time (approx.) | Description |
|---|---|---|---|
| Combine Dry Ingredients | Whisk | 2 minutes | Combine powdered sugar, cocoa powder, and salt in a bowl. |
| Add Liquid | Wooden Spoon | 3 minutes | Gradually add milk or cream, mixing until smooth. |
| Creaming (Stand Mixer) | Stand Mixer with Paddle Attachment | 5 minutes | Mix on low speed until smooth, then increase to medium. |
| Whisking (Stand Mixer or Hand Whisk) | Hand Whisk or Stand Mixer with Whisk Attachment | 2 minutes | Whisk until glossy. |
| Adjust Consistency | Wooden Spoon | 1-2 minutes | Adjust with milk/cream or powdered sugar as needed. |
Texture & Consistency

Old-fashioned chocolate icing, at its best, should have a smooth, glossy, and somewhat stiff texture. Think of a thick, but not overly sticky, coating that holds its shape well. This is crucial for proper application and visually appealing results. Achieving this consistency is key to a satisfying final product.
Desired Texture
The ideal texture of old-fashioned chocolate icing is a smooth, satiny surface that holds its shape when piped or spread, but isn’t so stiff that it cracks or feels gritty. It should be thick enough to coat the surface evenly, yet easy to spread or pipe without being runny. This consistency ensures a professional-looking finish, with a pleasant eating experience.
Factors Affecting Consistency
Several factors influence the consistency of the icing, including the ingredients used, the mixing method, and the temperature of the ingredients. For example, using a different type of chocolate or a different brand of powdered sugar will alter the end result.
Consistency at Different Stages
Different stages of the mixing process will produce different consistencies. Understanding these variations allows for better control and adjustments.
| Stage | Description | Consistency |
|---|---|---|
| Initial mixing | The icing will be dry and crumbly. | Powdery |
| Adding liquid | The icing will begin to come together. | Slightly thick, clumps will start to form |
| Complete mixing | The icing is thoroughly combined and smooth. | Thick, smooth, glossy |
| Cooling | The icing will thicken slightly as it cools. | Very thick, but smooth, no lumps |
Comparison of Chocolate Icing Types
Different types of chocolate icing, such as ganache or buttercream, have varying textures. Old-fashioned chocolate icing, as described here, is a more traditional style, typically with a thick, stiff consistency. Ganache, on the other hand, tends to be smoother and creamier. Buttercream is often lighter and fluffier. These differences in texture are largely due to the specific ingredients and mixing techniques used in each recipe.
Understanding these distinctions helps you choose the right icing for your project.
Flavor Variations & Enhancements
Taking a basic chocolate icing and adding a little creativity can unlock a whole new world of deliciousness. This section explores how to customize your icing to match your taste preferences, from subtle tweaks to bold transformations. We’ll look at different flavor profiles and how to adjust sweetness and bitterness for the perfect balance.
Flavor Variations
Different flavors can elevate a simple chocolate icing from ordinary to extraordinary. Beyond the basic cocoa flavor, a world of options awaits. Vanilla, coffee, or even a hint of mint can completely transform the taste. Adding fruit extracts or spices can create unexpected and delightful flavor combinations. Consider experimenting with different flavor profiles to find your perfect match.
Potential Additions
A variety of ingredients can be incorporated to create unique and exciting flavor profiles. Here’s a list of potential additions:
- Extracts: Vanilla, almond, peppermint, or even a touch of hazelnut extract can add subtle and complex flavors.
- Nuts: Chopped nuts like pecans, walnuts, or almonds add a satisfying crunch and nutty flavor. Consider adding a pinch of salt to enhance the nuttiness.
- Spices: A dash of cinnamon, nutmeg, or cardamom can warm up the icing and create an intriguing depth of flavor.
- Fruit Purees: Strawberry, raspberry, or cherry puree can create a vibrant and fruity icing, adding a burst of fresh flavor. Adjust sweetness accordingly.
- Cocoa Powder Variations: Experiment with different types of cocoa powder, such as Dutch-processed or natural, to alter the bitterness and sweetness.
Impact on Taste Profile
The addition of these ingredients alters the overall taste profile of the icing. For instance, vanilla extract adds a warm, comforting sweetness that complements the chocolate. Nuts provide a textural element and a satisfying crunch alongside the rich chocolate. Spices add a warm, inviting flavor, while fruit purees introduce a vibrant and refreshing dimension.
Adjusting Sweetness and Bitterness
The sweetness and bitterness of the icing can be adjusted to personal preference. A sweeter icing can be achieved by increasing the amount of sugar. To lessen the bitterness, you can add a little more milk or cream, or adjust the type of cocoa powder used. Begin by making small adjustments and tasting as you go.
Flavor Variation Table
This table summarizes the effects of various additions on the taste profile:
| Flavor Variation | Effect on Taste Profile |
|---|---|
| Vanilla Extract | Adds a warm, comforting sweetness that complements the chocolate. |
| Chopped Nuts | Adds a satisfying crunch and nutty flavor, enhancing the overall richness. |
| Cinnamon | Adds a warm, inviting, and slightly spicy depth to the chocolate flavor. |
| Strawberry Puree | Creates a vibrant and fruity icing, balancing the sweetness of the chocolate. |
| Dutch-Processed Cocoa Powder | Reduces the bitterness and enhances the sweetness of the icing. |
Decorating & Application
Getting your old-fashioned chocolate icing looking picture-perfect is all about understanding how it behaves and the best tools to use. Different techniques and consistency levels will give you varied results, so choosing the right approach for your project is key. This section will cover everything from basic spreading to fancy piping designs.
Making old-fashioned chocolate icing is a real treat, isn’t it? For a truly delightful experience, you might want to explore some options for estriol face cream Australia where to buy. estriol face cream australia where to buy Finding the perfect one will surely make your skin glow, just like the delicious chocolate icing on your favorite treats.
Let’s get back to the recipe and make that icing a reality!
Applying Icing to Baked Goods
Proper icing application starts with a clean, even base on your treats. Ensure your baked goods are completely cool before applying icing. This prevents the icing from melting and spreading unevenly. For cakes, frost the layers first, then level the top. For cookies, apply a thin, even layer to ensure even coverage.
If you’re working with cupcakes, a small amount of icing can create an impressive look.
Icing Techniques
Different techniques offer different decorating possibilities. Here are some common methods:
- Spreading: This method is perfect for achieving a smooth, even surface. Use a spatula or knife to spread the icing evenly over the baked goods. Practice makes perfect; a gentle, consistent motion is key for an even finish.
- Piping: Piping allows for precise and intricate designs. Using piping bags and various tips, you can create patterns, flowers, and other decorations. Start with simple designs and gradually increase your complexity as you gain experience.
Decorating Patterns & Designs
The possibilities for decorating are virtually endless! Here are some basic ideas:
- Simple patterns: Stripes, swirls, and dots are great for beginners. These patterns are achievable with basic spreading techniques or simple piping.
- Floral designs: Piping bags and various tips can create beautiful flower designs on cakes or cupcakes. Practice with different sizes and shapes for a unique look.
- Geometric patterns: Using a spatula or knife, you can create precise geometric patterns for a modern look. This works best with a firm, smooth consistency.
Icing Consistency
The consistency of your icing is crucial for proper application. A smooth, medium-thick consistency is ideal for spreading and piping. If the icing is too thin, it will run and spread unevenly. If it’s too thick, it will be difficult to spread or pipe. Adjust the consistency by adding a little bit of milk or water if needed.
A good consistency will allow for smooth application, while maintaining shape and preventing the icing from spreading unevenly.
Decorating Techniques Table
| Technique | Application | Consistency | Tools |
|---|---|---|---|
| Spreading | Cakes, cookies, cupcakes | Medium-thick | Spatula, knife |
| Piping | Cakes, cupcakes, cookies | Medium-thick | Piping bag, various tips |
| Drizzling | Cakes, cookies | Thin | Piping bag with a small tip, spoon |
Storage & Preservation
Keeping your homemade old-fashioned chocolate icing fresh and delicious is key to enjoying it to the fullest. Proper storage methods will prevent it from drying out, hardening, or developing unwanted flavors. This section will detail the best practices for preserving your icing, ensuring it’s ready when you are.
Optimal Storage Methods
Proper storage is crucial to maintain the icing’s smooth texture and rich flavor. Using airtight containers prevents moisture loss and keeps out unwanted flavors or aromas. Choose containers made of materials that won’t react with the icing, like glass or plastic. Avoid using metal containers, as they can sometimes affect the icing’s taste or color over time.
Preventing Drying Out or Hardening
To prevent the icing from drying out or becoming hard, maintain consistent moisture levels during storage. A humid environment is not ideal, but too dry an environment is the primary cause of problems. Storing the icing in a cool, dry place, ideally below 70°F (21°C), is generally best. Avoid storing it in direct sunlight or near heat sources.
Freezing isn’t a good option for this type of icing, as it can cause it to crystallize.
Storage Duration
The shelf life of your old-fashioned chocolate icing depends on the storage conditions. Under ideal circumstances, it can remain usable for several days. If properly stored, it should remain fresh for 3-5 days in the refrigerator. However, factors like the ingredients used, the exact recipe followed, and the specific storage environment will influence the precise lifespan. It’s always best to check the icing for any signs of changes in texture or flavor before using it.
Maintaining Quality
For the best quality, avoid repeated openings and closings of the container. Each time you open the container, some moisture escapes, increasing the risk of drying out. Also, be mindful of the environment where the icing is stored. Extreme temperature fluctuations should be avoided. Consistency in temperature and humidity is critical for maintaining quality.
Storage Table
| Storage Method | Duration (Approximate) |
|---|---|
| Refrigerator (airtight container) | 3-5 days |
| Cool, dry pantry (airtight container) | 1-2 days |
Avoid storing icing in the freezer. Freezing can cause crystallization, which will significantly affect the texture.
Troubleshooting & Common Mistakes
Making perfect old-fashioned chocolate icing can be tricky, but don’t worry! A few common issues are easily fixed. Understanding the reasons behind these problems is key to preventing them in the future and ensuring a smooth, delicious icing experience.Troubleshooting is crucial because it allows you to address issues quickly and effectively, saving time and ensuring a professional-looking final product.
Identifying the root causes of icing problems will prevent you from repeating these errors.
Icing Consistency Issues
Consistency is key to a great chocolate icing. Variations in ingredients or mixing methods can lead to a range of problems. Understanding these potential issues will help you create the perfect icing every time.
Making old-fashioned chocolate icing is a real treat, isn’t it? It’s so comforting, just like savoring delicious Italian food at some of the fantastic Italian restaurants in St Ives, like those featured in this guide: italian restaurants in st ives. The rich, decadent flavor of the icing reminds me of the warm, welcoming atmosphere of these restaurants.
Hopefully, this recipe will bring a little bit of that Italian charm into your kitchen!
- Too Thick: If your icing is too thick, it’s likely due to a lack of liquid or insufficient mixing. The powdered sugar may have absorbed too much of the liquid ingredients, or the butter may not have been sufficiently softened or melted. This could also be from the ratio of ingredients being off.
Rectifying this involves gradually adding more liquid, such as milk or cream, a tablespoon at a time, while mixing thoroughly.Keep checking the consistency and add more liquid as needed until it reaches the desired smoothness. If the butter isn’t properly softened, the icing will struggle to incorporate the ingredients effectively.
- Too Thin: A thin icing is typically caused by adding too much liquid. If you added too much milk, cream, or water, the icing will lose its structure. This can also occur if the butter is too warm. This can result in a runny, spreadable icing that might not hold its shape when decorating.
To fix this, add more powdered sugar, a tablespoon at a time, while mixing continuously.This will help thicken the icing and return it to the right consistency. If the butter is too warm, the icing will be thinner than desired, requiring more powdered sugar to thicken it.
Texture Issues, Recipe for old fashioned chocolate icing
Achieving the right texture is essential for a satisfying icing experience. The texture can be affected by the ingredients and the mixing process.
- Grainy Icing: If your icing feels grainy, it’s likely due to insufficient mixing or the use of overly fine powdered sugar. Inconsistent mixing or insufficient time spent mixing can cause clumps of sugar to remain.
Ensure thorough mixing, incorporating all ingredients evenly. Mixing for a longer period will also improve the texture by fully dissolving any sugar clumps.Using a slightly coarser powdered sugar can also be beneficial in preventing this issue.
- Streaky Icing: Streaky icing can occur from uneven mixing. This can be caused by not mixing for long enough, or using a low speed on your mixer. This can cause streaks or uneven coloration in the icing.
To remedy this, mix at a higher speed for a longer duration, ensuring that all ingredients are fully combined.Ensure that all the ingredients are completely incorporated into the icing to eliminate streaks.
Troubleshooting Table
| Problem | Cause | Solution |
|---|---|---|
| Too Thick | Insufficient liquid or poorly softened butter | Gradually add more liquid (milk, cream) while mixing. |
| Too Thin | Too much liquid | Add more powdered sugar, a tablespoon at a time, while mixing. |
| Grainy Icing | Insufficient mixing or overly fine powdered sugar | Mix thoroughly for a longer period. |
| Streaky Icing | Uneven mixing | Mix at a higher speed for a longer duration. |
Visual Representation
The visual appeal of your old-fashioned chocolate icing is crucial to the overall enjoyment of the dessert. A beautifully crafted icing can elevate a simple treat to a delectable masterpiece. This section will guide you in achieving a visually stunning result.
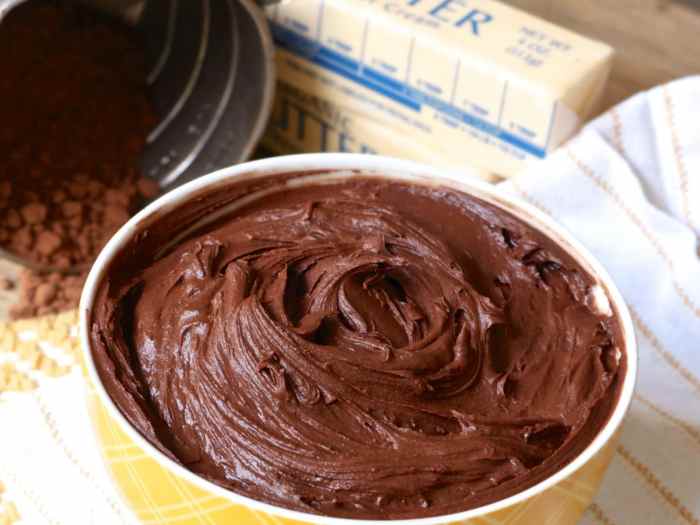
Finished Icing Appearance
The finished icing should exhibit a rich, glossy sheen, showcasing the quality of the ingredients and the care taken in its preparation. A consistent texture, whether smooth or subtly textured, is important for visual appeal. The color should be deep, dark chocolate, with a possible slight variation in shade depending on the specific chocolate used. A deep, dark tone will enhance the visual contrast with the dessert beneath.
Color, Texture, and Sheen
A smooth, glossy sheen is highly desirable in chocolate icing. A deep, rich chocolate color enhances the visual impact.
The texture should be smooth and even, without any lumps or inconsistencies. The sheen should be noticeable, reflecting light and adding a touch of elegance to the icing. The color should be a deep, rich brown, potentially varying slightly based on the type of chocolate used. A deep, rich tone will contrast well with lighter desserts.
Lighting and Background
Lighting plays a significant role in how the icing appears. Natural light often enhances the color and sheen of the icing, while artificial lighting can cast unwanted shadows. The background of the dessert presentation should complement the icing’s color and texture. A simple, neutral background will allow the icing to stand out.
Icing on a Dessert
The visual presentation of the icing on a dessert matters greatly. The icing should be applied evenly and smoothly, creating a visually appealing design. A professional-looking finish will elevate the overall presentation. The placement of the icing should consider the shape and size of the dessert, aiming for a balanced and attractive look.
Visual Characteristics
The icing should exhibit a uniform, smooth texture, free of lumps or air bubbles. Its color should be a deep, rich chocolate brown, reflecting the quality of the ingredients. A glossy sheen, reflecting light, should be apparent, contributing to the overall visual appeal.
The icing should be applied smoothly and evenly, allowing the texture and color to be appreciated on the dessert. The icing should flow gracefully and smoothly across the dessert surface, without any noticeable lines or imperfections. Consider the shape of the dessert when applying the icing; it should complement the overall design and not overpower it. For example, a delicate flower-shaped cake would look stunning with a smooth layer of icing.
A large, round cake might look equally impressive with swirling or piped icing.
Last Point: Recipe For Old Fashioned Chocolate Icing
In conclusion, this recipe for old-fashioned chocolate icing offers a complete guide for creating a delectable and visually appealing dessert topping. From choosing the right ingredients to achieving the perfect consistency and decorating techniques, this recipe provides a step-by-step approach for mastering this classic. With variations in flavor and application, the possibilities are endless. Enjoy the process of creating this beautiful and delicious icing.
Common Queries
What are the typical variations in chocolate type for the icing?
Different types of chocolate, such as dark chocolate, milk chocolate, or semi-sweet chocolate, can be used. The choice will affect the flavor profile of the icing.
What are common mistakes when making chocolate icing, and how can they be avoided?
Common mistakes include using ingredients that are too cold or using the wrong mixing method. These can lead to the icing being too thick or thin. Adjusting the temperature of the ingredients and using the proper mixing techniques will prevent these issues.
How long can the finished icing be stored before it dries out?
Properly stored, the icing can last for several days in an airtight container in the refrigerator. However, the shelf life is dependent on storage conditions and the specific recipe.
What are some tips for maintaining the icing’s quality during storage?
Store the icing in an airtight container in the refrigerator to prevent it from drying out. Ensure that the icing is not exposed to direct sunlight or extreme temperatures.
